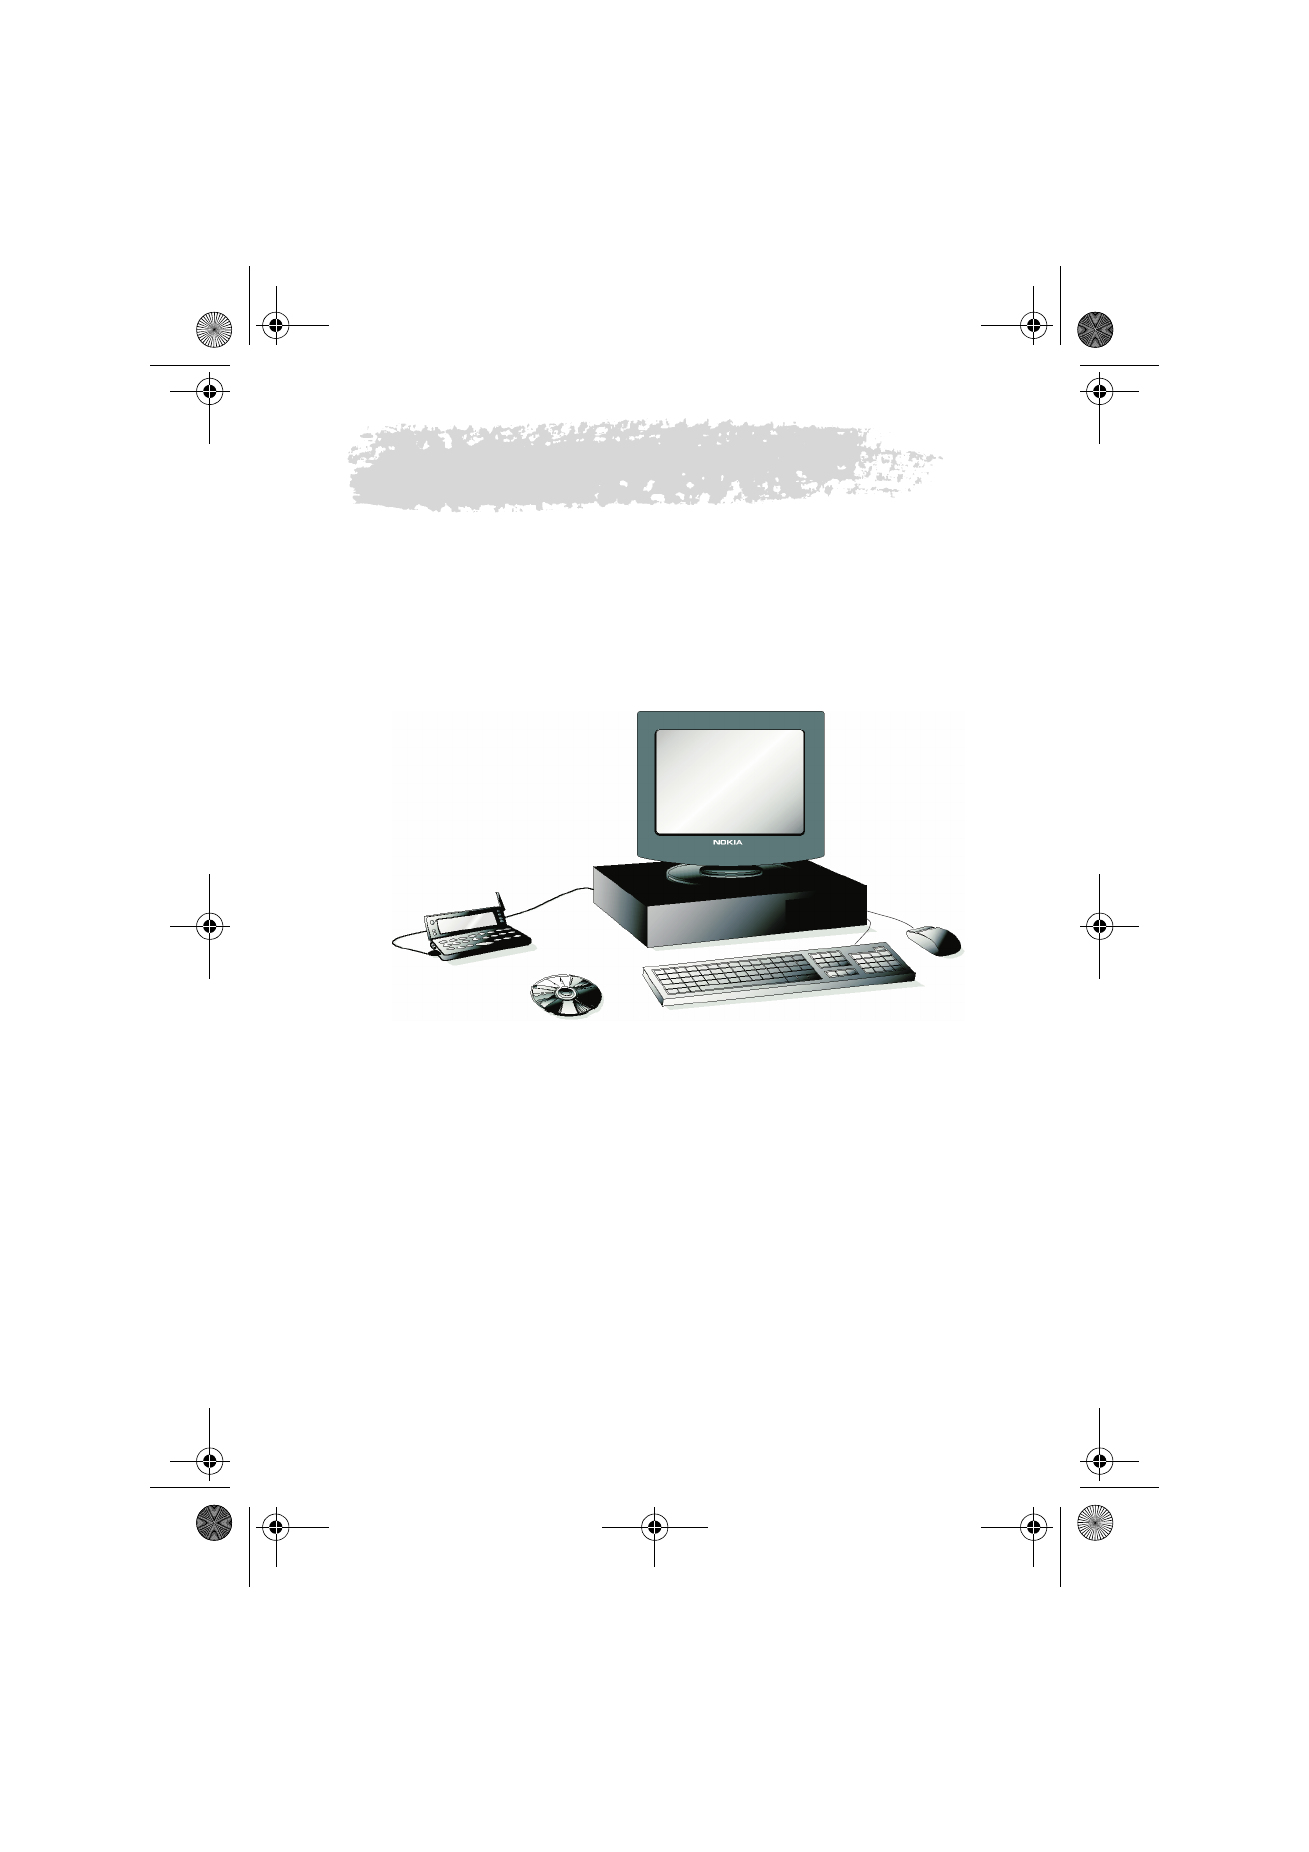
To use the PC Suite
You can connect your communicator to a suitable PC with the PC Suite for
Nokia 9110 Communicator program.
The PC Suite and its user’s guide are found on the CD-ROM supplied in the
communicator sales package.
The PC Suite works with, for example, Windows 95/98, Windows 2000 and NT
4.0, and requires IBM-compatible 486 PC or higher.
With the Intellisync function in the PC Suite, you can synchronise data
between your communicator and a PC, for example, calendar events and
contact data. See ”Intellisync” on page 32. The PC Suite supports, for example,
Outlook 97, 98, 2000, and LotusNotes 4.5 and 4.6. More information can be
found in the PC Suite for Nokia 9110 Communicator User Guide found on the
CD-ROM.
When using the PC Suite, you only need to connect your communicator to a
PC; everything else is done on the PC.
Figure 1
Um_spock3.bk Page 29 Thursday, June 1, 2000 10:11 AM
30
©2000 Nokia Mobile Phones. All rights reserved.
To install the PC Suite on a PC
The CD-ROM should launch itself automatically after you have inserted it into
the CD drive of your PC. If not, please, follow these steps:
1 Click the Windows “Start” button; then click “Run”.
2 If your PC has Windows 95, 98, 2000 or NT 4.0 (or later), type d:\9110.exe
in the command line. Substitute the letter “d” with the letter of the CD
drive.
3 Press Enter.
4 Follow the instructions shown on the screen.
To use the PC Suite with an infrared connection
1 The IrDA software must be installed and running on the PC. To check if the
IrDA driver is already installed on the PC, go to the Control Panel. If there is
an icon called Infrared, the driver has been installed.
2 Make sure that the infrared port of the communicator faces the infrared
port of the PC. Keep the infrared link clear: check the infrared indicators in
the indicator area, see ”Communicator display” on page 10. If the infrared
link is obstructed for too long, for example, if something is moved between
the infrared sensors or the communicator is moved, the operation is
interrupted.
3 Start the PC Suite software on the PC. In the Preference dialog, select IR as
the data transfer protocol, and the correct COM port.
4 Start the Infrared activation application on your communicator and press
Activate. See ”Infrared activation” on page 117.
Note: Making or answering phone
calls during a PC connection is not
recommended as it might disrupt
the operation.
Note: The PC Suite for Nokia 9110
Communicator program can be found
in the Menu under the heading “PC
and Macintosh software”.
Note: The infrared connection in Windows
2000 and NT 4.0 is not compatible with the
communicator. When using these operating
systems, connection to the PC must be
made via cable.
Um_spock3.bk Page 30 Thursday, June 1, 2000 10:11 AM
31
©2000 Nokia Mobile Phones. All rights reserved.
To use the PC Suite with a cable connection
1 Connect the 9-pin end of the RS-232 adapter cable DLR-2 to the COM port
of the PC, and the other end to the connector at the bottom of the
communicator. See ”Connectors” on page 17.
2 Start the PC Suite software on the PC.
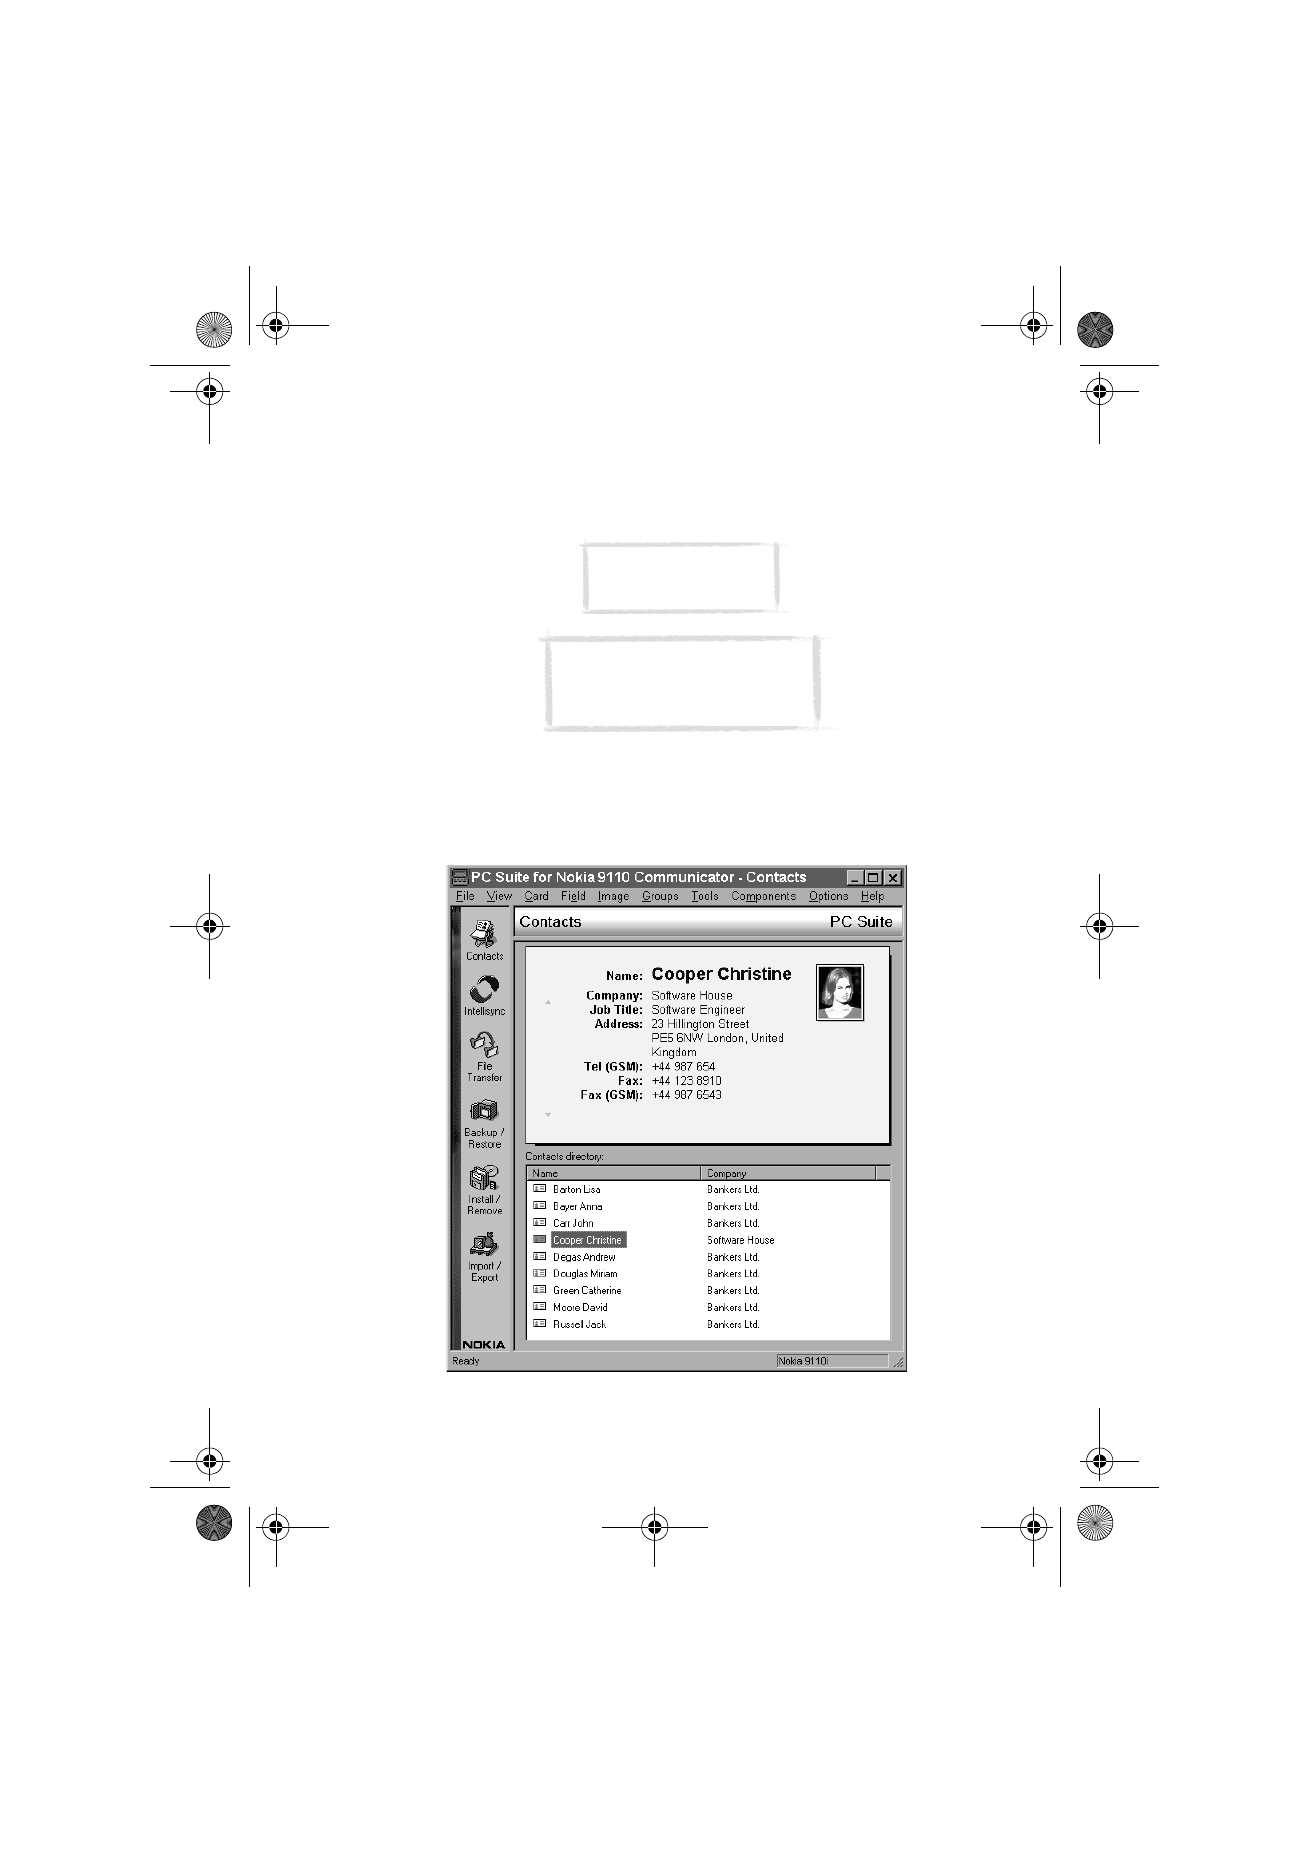
Contacts
The Contacts function of the PC Suite lets you create, edit and update contact
cards on your Nokia 9110i Communicator, and transfer them between a PC
and your communicator. To start the Contacts application, click on the
Contacts icon in the main screen.
Figure 2
Note: Remember to
make backup copies of
all important data!
Tip: You can also use the optional
deskstand for easy PC connectivity.
See the Accessories guide.
Um_spock3.bk Page 31 Thursday, June 1, 2000 10:11 AM
32
©2000 Nokia Mobile Phones. All rights reserved.
Intellisync
With the Intellisync function you can synchronise data between your
communicator and a PC.
1 Connect your communicator to the PC.
2 Start the PC Suite program on the PC and click the Intellisync icon in the
main screen.
3 The Local (i.e. PC) tab is automatically selected. Click the Settings button.
4 This displays the PC Suite Configuration dialog with the Calendar,
Contacts, and To-do list applications of your communicator.
5 Click on the communicator application you want to configure.
6 Click the Choose button to enter the Choose Translator dialog. The Choose
Translator dialog lists all the PC applications that are compatible with the
communicator application you selected.
7 Click the OK button in the Choose Translator dialog to return to the
Configuration dialog. Now the PC application you selected appears next to
the name of the communicator application.
8 Specify the application and, if necessary, the file you want to synchronise.
Note: You may be presented with a dialog containing the
tabs Format and File. In the Format tab, select the
address format that you are using for addresses in your
communicator. The Contacts Format 5 is recommended.
In the File tab, indicate if you want to synchronise
Contacts on the communicator memory, or on the
memory card. After this, click OK.
Note: The first time you select Microsoft
Outlook in the Choose Translator dialog, use
the Browse button to locate the data in your
Outlook folder which you wish to synchronise.
Note: In order to synchronise data successfully
between your communicator and a PC application, click
on the Advanced button after selecting the application
with which to do the synchronisation.
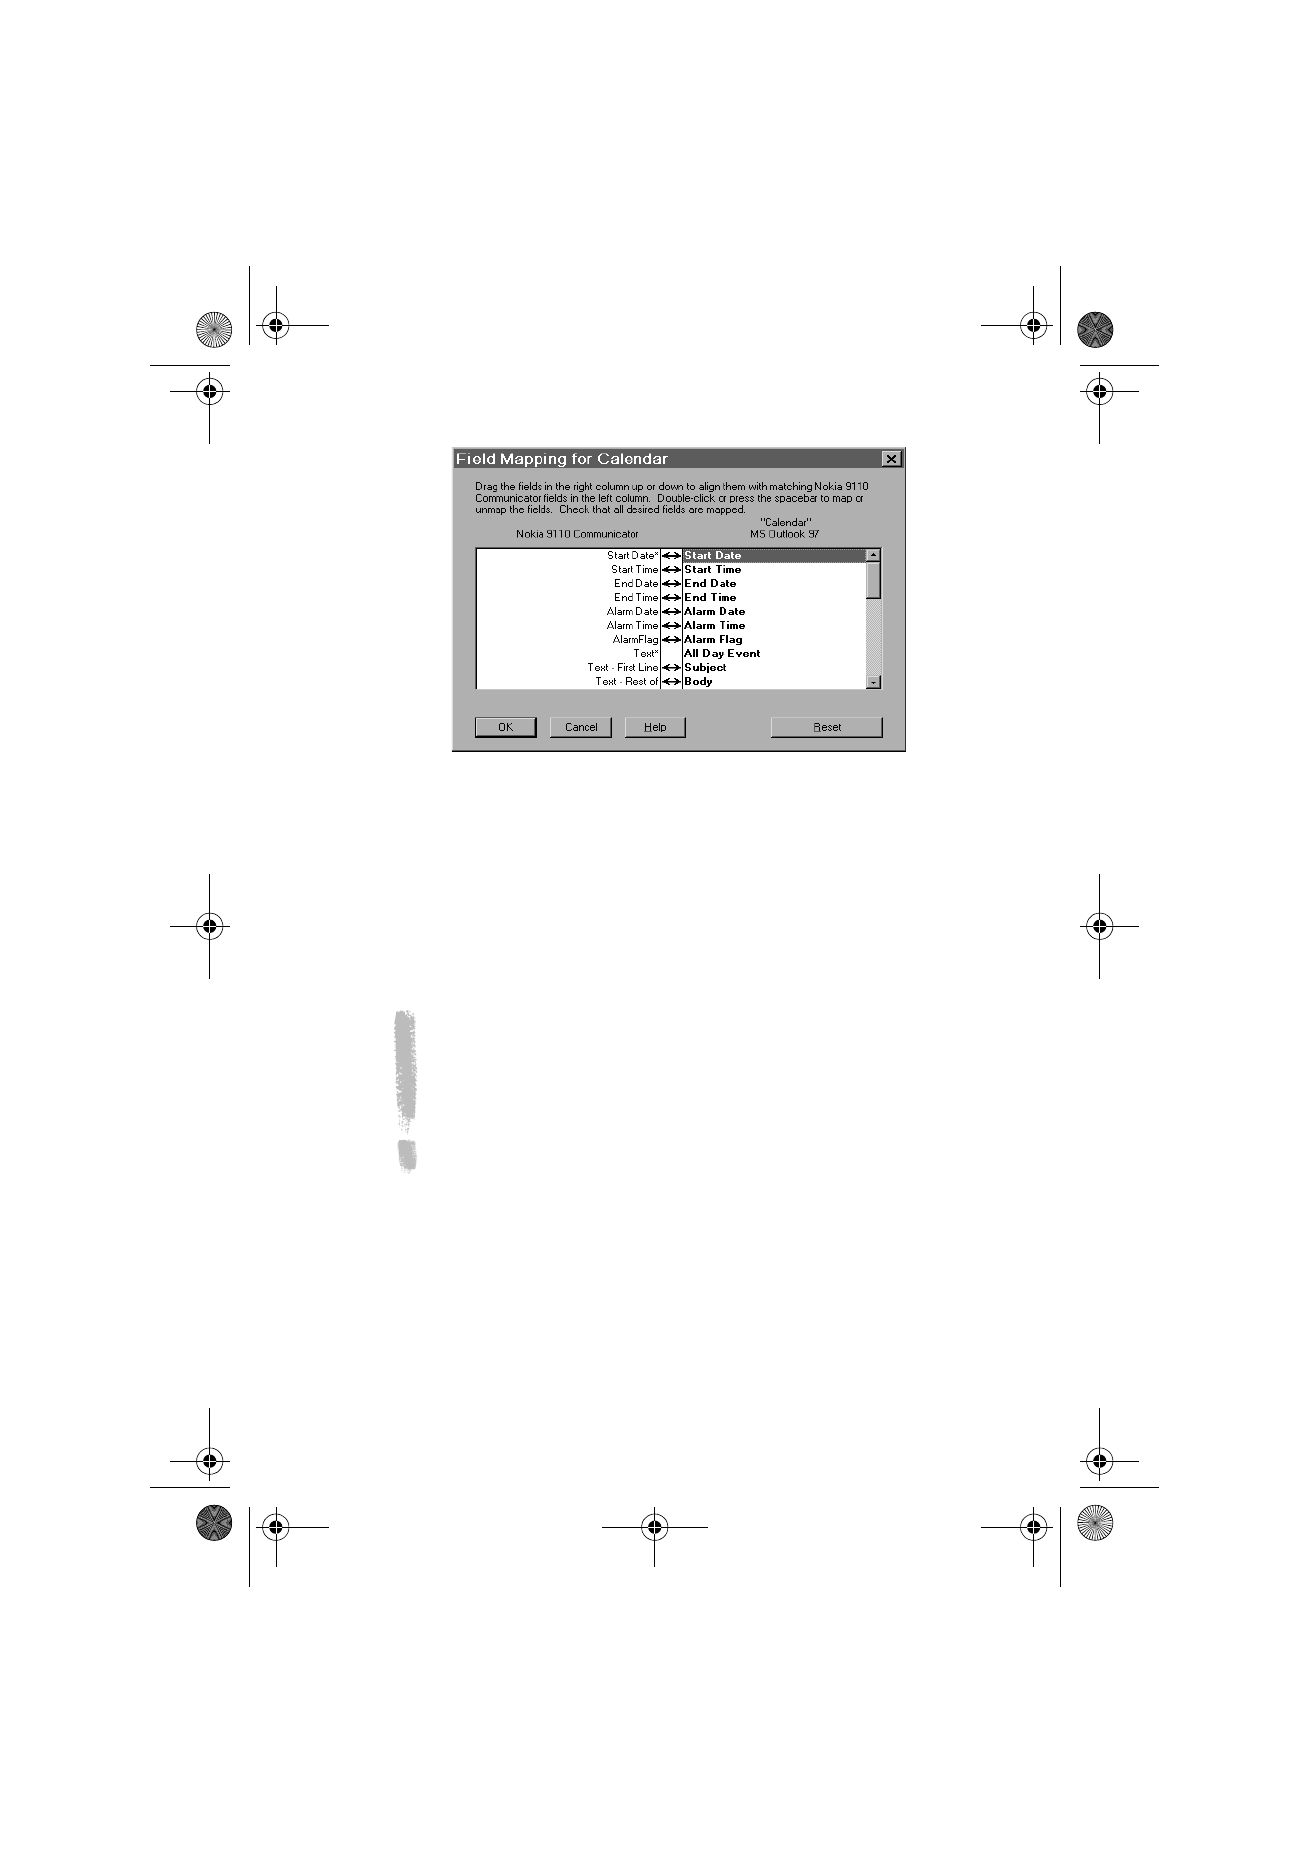
In the Advanced settings dialog, click on Field Mapping
and match the fields of the PC application with those
fields of the communicator that have been marked with
asterisks, see figure 3.
Um_spock3.bk Page 32 Thursday, June 1, 2000 10:11 AM
33
©2000 Nokia Mobile Phones. All rights reserved.
9 When you are ready to perform the operation, click the OK button at the
bottom of the Configuration dialog.
10 Click the Synchronise button on the PC Suite opening screen.
11 If prompted, resolve data conflicts.
12 A confirmation prompt appears, showing you how many adds, changes,
and deletes will be applied to each of your systems if you proceed with the
operation. Click Accept to proceed, or Cancel to discontinue.
Note: If you have a very large contact database in your
communicator, you might not have enough free memory in the
communicator to complete the synchronisation operation. The
maximum amount of contacts that can be successfully synchronised,
depending on the amount of free memory in the communicator, is
about 1000 contacts. Refer to "Quick Start Tutorial" in Chapter 3 of
the PC Suite for Nokia 9110 Communicator User Guide found on the
CD-ROM for instructions on how to synchronise contacts on the
memory card.
Figure 3
Um_spock3.bk Page 33 Thursday, June 1, 2000 10:11 AM
34
©2000 Nokia Mobile Phones. All rights reserved.
File transfer
The File Transfer application lets you move, copy, paste, rename, and remove
communicator and PC files.
1 Establish a connection between your communicator and a PC. See above.
2 Start the PC Suite program on the PC and click the File Transfer icon in the
main screen.
3 Select an item by clicking on it in the File Transfer screen with the mouse
and drag and drop it to the appropriate PC directory or communicator folder.
Backup / Restore
The Backup/Restore function enables you to create backups of your
communicator data on a PC and later restore the data in the communicator.
1 Establish a connection between your communicator and a PC, see above.
2 Start the PC Suite program on the PC and click the Backup/Restore icon in
the main screen.
Figure 4
Note: Faxes are transferred from the
communicator to a PC in TIFF format; this
means that you need to use Windows Imaging
to view more than the first page of a fax.
Um_spock3.bk Page 34 Thursday, June 1, 2000 10:11 AM
35
©2000 Nokia Mobile Phones. All rights reserved.
3 Click on the Backup tab and select one of the following options: All device
data backs up all of the data in your communicator, Selected device data
allows you to select whether to backup your Calendar data, Contacts,
Documents, or Settings, or select Memory card data to backup the
information on your memory card.
4 In the “Backup Path” box, specify the location where you want the backups
to be stored. The backup name is assigned automatically.
5 Enter a number between 1 and 99 in the ”Number of backup stores” box.
6 Click the Backup button.
To restore data, click on the Restore tab. Specify the location of the backup in
the ”Backup stored in” box. In the lower box, click on the data you want to
restore. Click Restore to restore the backup to your communicator.
Install / Remove
The Install/Remove software function lets you install and remove software
from your communicator.
1 Establish a connection between your communicator and a PC, see above.
2 Start the PC Suite program on the PC and click the Install/Remove icon in
the main screen.
3 Click the Install tab and enter the location of the software you want to
install in the ”Select Path” box.
4 Click on the software you want to install in the box below.
5 Click the Install button.
To remove software from your communicator, click the Remove tab. Select the
software you want to remove in the box and click the Remove button.
Import / Export
The Import/Export function can be used to transfer calendar and contacts files
between your communicator and a PC.
1 Establish a connection between your communicator and a PC, as shown
above.
Note: If you install to the Nokia 9110i Communicator
software made for the older communicator models, be
aware that the greyscales of the devices are different.
Therefore, the display may seem lighter. The difference
in greyscales does not affect the functioning of the
software. You should always try to install the version
made especially for the Nokia 9110 or 9110i
communicator.
Um_spock3.bk Page 35 Thursday, June 1, 2000 10:11 AM
36
©2000 Nokia Mobile Phones. All rights reserved.
2 Start the PC Suite program on the PC and click the Import/Export icon in
the main screen.
3 Click the Export tab and choose one of three options: Calendar data;
Contacts; Contacts File on Memory Card.
4 In the ”Select the PC file to create” box, specify the name and path of the
PC file you want to create.
5 Click the Export button.
To import a file from a PC to your communicator, click the Import tab and
select which items to import. Specify the PC file that you want to transfer to
your communicator and click the Import button.